

Hello world!
Welcome to WordPress. This is your first post. Edit or delete it, then start writing!
Разработка сайтов — заказать разработку сайта
Welcome to this tutorial where we’ll delve into the process of crafting your own custom Elementor widget. In real-world projects, there are often instances where the standard set of widgets in Elementor, whether in the Free or Pro version, might not fully meet your design or functional requirements. This is where the ability to create custom widgets becomes invaluable, empowering you to design layouts or blocks precisely tailored to your needs.
Let’s explore how to develop custom Elementor widgets, equipping you with the knowledge to navigate such situations effectively and enhance your website-building capabilities.
Read this tutorial, and I will show you exactly how. Trust me, it is very easy.
Before we start, there are a few things you’ll need to have:
We’ll be creating a custom plugin to hold our widget. Why a plugin, you ask? Well, because Elementor reads from the plugins directory when looking for widgets to add to its library.
In your WordPress plugins directory (wp-content/plugins), create a new folder for your plugin. You can name it anything you like. I’ll call mine image-comparison.
In your new plugin directory, create a new PHP file with the same name as your folder (e.g., image-comparison.php). This will be the main plugin file where we’ll write the initial code.
Inside this, let’s put the plugin declaration so WordPress can recognize this plugin.
					<?php
/**
 * Plugin Name: Before | After picture slider
 * Description: Slider that show before and after on a picture
 * Plugin URI:  https://standigital.lv
 * Version: 1.0
 * Author: StanDigital
 * Author URI: https://standigital.lv
 * Text Domain: image-comparison-elementor-widget
 *
 * Elementor tested up to: 3.19.3
 * Elementor Pro tested up to: 3.19.3
 */
Now, let’s break down what this code does. First, it sets up the basic information for the plugin, such as its name, description, version, author, and more. This information is important for identifying and managing the plugin within the WordPress ecosystem.
So now, in the dashboard, if you go to Plugins, you see, our plugin is here.

We made a custom WordPress Elementor widgets plugin
Cool, right. We just created a plugin. Now it is time to write our code.
First, I am applying a very basic check, so that, no one access the plugin directly, it is for security.
					// Exit if accessed directly
if ( ! defined( 'ABSPATH' ) ) {
    exit; // Exit if accessed directly
}
Now, moving to the main things.
We will now register our custom Elementor widget. I am going to follow this documentation from the Elementor website.
So let’s put this.
					// Register Widget
function register_image_comparison_widget( $widgets_manager ) {
    require_once( __DIR__ . '/widgets/image-comparison-widget.php' );
    $widgets_manager->register( new \Elementor_Image_Comparison_Widget() );
}
add_action( 'elementor/widgets/register', 'register_image_comparison_widget' );

// Enqueue Scripts and Styles
function enqueue_image_comparison_widget_scripts() {
    wp_enqueue_style( 'image-comparison-widget-style', plugins_url( 'style.css', __FILE__ ) );
    wp_enqueue_script( 'image-comparison-widget-script', plugins_url( 'script.js', __FILE__ ), array('jquery'), false, true );
}
add_action( 'wp_enqueue_scripts', 'enqueue_image_comparison_widget_scripts' );
This code snippet serves two main purposes:
It includes the file containing the widget class (image-comparison-widget.php) using require_once.
Then it registers an instance of the Elementor_Image_Comparison_Widget class using $widgets_manager->register(). This class should be defined in the included PHP file.
It enqueues a CSS file (style.css) using wp_enqueue_style. This file contains the styling specific to the custom widget.
It enqueues a JavaScript file (script.js) using wp_enqueue_script. This file contain necessary JavaScript functionalities for the widget, and it’s dependent on jQuery, as indicated by array(‘jquery’).
The last parameter of wp_enqueue_script being true indicates that the script should be loaded in the footer of the page, which is often recommended for better performance.
Now the plugin main file’s “image-comparison.php” complete codes are
					<?php
/**
 * Plugin Name: Before | After picture slider
 * Description: Slider that show before and after on a picture
 * Plugin URI:  https://standigital.lv
 * Version: 1.0
 * Author: StanDigital
 * Author URI: https://standigital.lv
 * Text Domain: image-comparison-elementor-widget
 *
 * Elementor tested up to: 3.19.3
 * Elementor Pro tested up to: 3.19.3
 */

// Exit if accessed directly
if ( ! defined( 'ABSPATH' ) ) {
    exit; // Exit if accessed directly
}

// Register Widget
function register_image_comparison_widget( $widgets_manager ) {
    require_once( __DIR__ . '/widgets/image-comparison-widget.php' );
    $widgets_manager->register( new \Elementor_Image_Comparison_Widget() );
}
add_action( 'elementor/widgets/register', 'register_image_comparison_widget' );

// Enqueue Scripts and Styles
function enqueue_image_comparison_widget_scripts() {
    wp_enqueue_style( 'image-comparison-widget-style', plugins_url( 'style.css', __FILE__ ) );
    wp_enqueue_script( 'image-comparison-widget-script', plugins_url( 'script.js', __FILE__ ), array('jquery'), false, true );
}
add_action( 'wp_enqueue_scripts', 'enqueue_image_comparison_widget_scripts' );
Let’s now create our Elementor widget.
Let’s create the folder “widgets” and then inside this, create the widget file we have included, that is “image-comparison-widget.php”.
We are creating the widget file inside the “widgets” folder because we wrote this ‘/widgets/card-widget.php‘ in the Plugin main file “image-comparison.php“.
Now start writing our widget code inside the file.
First, we will write, the very basic check for security, so no one can access the file directly.
					<?php
if ( ! defined( 'ABSPATH' ) ) {
	exit; // Exit if accessed directly.
}
Next, we will write our widget class.
					class Elementor_Image_Comparison_Widget extends Widget_Base {

    public function get_name() {
        return 'image-comparison-widget';
    }

    public function get_title() {
        return __( 'Image Comparison', 'image-comparison-widget' );
    }

    public function get_icon() {
        return 'eicon-image-before-after';
    }

    public function get_categories() {
        return [ 'basic' ];
    }
Okay, so, now the most interesting part, where we will start coding our widget fields.
So, we will write the protected function “register_controls()”.
					   protected function _register_controls() {
        $this->start_controls_section(
            'content_section',
            [
                'label' => __( 'Content', 'plugin-name' ),
                'tab' => Controls_Manager::TAB_CONTENT,
            ]
        );

        $this->add_control(
            'background_image',
            [
                'label' => __( 'Background Image', 'plugin-name' ),
                'type' => Controls_Manager::MEDIA,
                'default' => [
                    'url' => \Elementor\Utils::get_placeholder_image_src(),
                ],
            ]
        );

        $this->add_control(
            'foreground_image',
            [
                'label' => __( 'Foreground Image', 'plugin-name' ),
                'type' => Controls_Manager::MEDIA,
                'default' => [
                    'url' => \Elementor\Utils::get_placeholder_image_src(),
                ],
            ]
        );

        $this->add_control(
            'slider_position',
            [
                'label' => __( 'Slider Position', 'plugin-name' ),
                'type' => Controls_Manager::SLIDER,
                'size_units' => [ '%' ],
                'range' => [
                    '%' => [
                        'min' => 0,
                        'max' => 100,
                        'step' => 1,
                    ],
                ],
                'default' => [
                    'unit' => '%',
                    'size' => 50,
                ],
            ]
        );

        $this->end_controls_section();
    }
On the Elementor website, you will find all the controls, like text fields, text area fields, etc. you can declare.
An array with settings for the section:
An array with settings for the control:
Additional settings specific to each control type, such as ‘size_units‘, ‘range‘, and ‘default‘, are provided to customize the behavior and appearance of the controls.
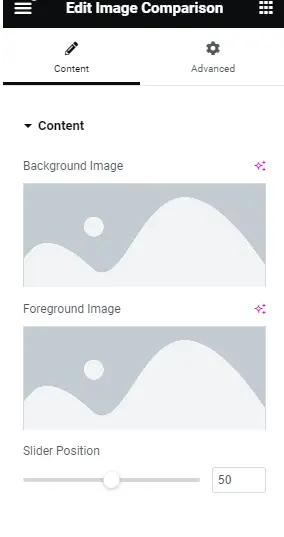
Elementor widget content section under content tab when it is final
Let’s dive into crafting the code that will bring our widget to life on the front end. We’re about to create the render() function, which is responsible for generating the widget’s visual output on the front end of your website.
					protected function render() {
        $settings = $this->get_settings_for_display();
        ?>
        <div class="acontainer">
            <div id="comparison">
                <figure style="background-image: url('<?php echo esc_url($settings['background_image']['url']); ?>');">
                    <div id="handle"></div>
                    <div id="divisor" style="background-image: url('<?php echo esc_url($settings['foreground_image']['url']); ?>');"></div>
                </figure>
                <input type="range" min="0" max="100" value="<?php echo esc_attr($settings['slider_position']['size']); ?>" id="slider" oninput="moveDivisor()">
            </div>
        </div>
        <?php
    }

    protected function _content_template() {
        ?>
        <#
        var bgImage = settings.background_image.url;
        var fgImage = settings.foreground_image.url;
        var sliderPos = settings.slider_position.size;
        #>
        <div class="acontainer">
            <div id="comparison">
                <figure style class="perfmatters-lazy" data-bg="http://%20bgImage%20" >
                    <div id="handle"></div>
                    <div id="divisor" style class="perfmatters-lazy" data-bg="http://%20fgImage%20" ></div>
                </figure>
                <input type="range" min="0" max="100" value="{{ sliderPos }}" id="slider" oninput="moveDivisor()">
            </div>
        </div>
        <?php
    }
}
					<?php
use Elementor\Widget_Base;
use Elementor\Controls_Manager;

class Elementor_Image_Comparison_Widget extends Widget_Base {

    public function get_name() {
        return 'image-comparison-widget';
    }

    public function get_title() {
        return __( 'Image Comparison', 'image-comparison-widget' );
    }

    public function get_icon() {
        return 'eicon-image-before-after';
    }

    public function get_categories() {
        return [ 'basic' ];
    }

    protected function _register_controls() {
        $this->start_controls_section(
            'content_section',
            [
                'label' => __( 'Content', 'plugin-name' ),
                'tab' => Controls_Manager::TAB_CONTENT,
            ]
        );

        $this->add_control(
            'background_image',
            [
                'label' => __( 'Background Image', 'plugin-name' ),
                'type' => Controls_Manager::MEDIA,
                'default' => [
                    'url' => \Elementor\Utils::get_placeholder_image_src(),
                ],
            ]
        );

        $this->add_control(
            'foreground_image',
            [
                'label' => __( 'Foreground Image', 'plugin-name' ),
                'type' => Controls_Manager::MEDIA,
                'default' => [
                    'url' => \Elementor\Utils::get_placeholder_image_src(),
                ],
            ]
        );

        $this->add_control(
            'slider_position',
            [
                'label' => __( 'Slider Position', 'plugin-name' ),
                'type' => Controls_Manager::SLIDER,
                'size_units' => [ '%' ],
                'range' => [
                    '%' => [
                        'min' => 0,
                        'max' => 100,
                        'step' => 1,
                    ],
                ],
                'default' => [
                    'unit' => '%',
                    'size' => 50,
                ],
            ]
        );

        $this->end_controls_section();
    }

    protected function render() {
        $settings = $this->get_settings_for_display();
        ?>
        <div class="acontainer">
            <div id="comparison">
                <figure style="background-image: url('<?php echo esc_url($settings['background_image']['url']); ?>');">
                    <div id="handle"></div>
                    <div id="divisor" style="background-image: url('<?php echo esc_url($settings['foreground_image']['url']); ?>');"></div>
                </figure>
                <input type="range" min="0" max="100" value="<?php echo esc_attr($settings['slider_position']['size']); ?>" id="slider" oninput="moveDivisor()">
            </div>
        </div>
        <?php
    }

    protected function _content_template() {
        ?>
        <#
        var bgImage = settings.background_image.url;
        var fgImage = settings.foreground_image.url;
        var sliderPos = settings.slider_position.size;
        #>
        <div class="acontainer">
            <div id="comparison">
                <figure style class="perfmatters-lazy" data-bg="http://%20bgImage%20" >
                    <div id="handle"></div>
                    <div id="divisor" style class="perfmatters-lazy" data-bg="http://%20fgImage%20" ></div>
                </figure>
                <input type="range" min="0" max="100" value="{{ sliderPos }}" id="slider" oninput="moveDivisor()">
            </div>
        </div>
        <?php
    }
}
Now lets create style.css in the main plugin folder. This file will hold all the essential styles for our Image Comprasion widget
					.acontainer {
  max-width: 800px;
}

#comparison {
  width: 100%;
  padding-bottom: 100%;
  overflow: hidden;
  position: relative;
}

figure {
  position: absolute;
  background-size: cover;
  font-size: 0;
  width: 100%;
  height: 100%;
  margin: 0;
}

#divisor {
  background-size: cover;
  position: absolute;
  width: 50%;
  box-shadow: 0 5px 10px -2px rgba(0, 0, 0, 0.3);
  bottom: 0;
  height: 100%;

 &::before,
  &::after {
    content: "";
    position: absolute;
    right: -2px;
    width: 4px;
    height: calc(50% - 25px);
    background: white;
    z-index: 3;
  }
  &::before {
    top: 0;
    box-shadow: 0 -3px 8px 1px rgba(0, 0, 0, 0.3);
  }
  &::after {
    bottom: 0;
    box-shadow: 0 3px 8px 1px rgba(0, 0, 0, 0.3);
  }
}
#handle {
  position: absolute;
  height: 50px;
  width: 50px;
  top: 50%;
  left: 50%;
  transform: translateY(-50%) translateX(-50%);
  z-index: 1;

 &::before,
  &::after {
    content: "";
    width: 0;
    height: 0;
    border: 6px inset transparent;
    position: absolute;
    top: 50%;
    margin-top: -6px;
  }
  &::before {
    border-right: 6px solid white;
    left: 50%;
    margin-left: -17px;
  }
  &::after {
    border-left: 6px solid white;
    right: 50%;
    margin-right: -17px;
  }
}
input[type="range"] {
  -webkit-appearance: none;
  -moz-appearance: none;
  position: absolute;
  top: 50%;
  left: -25px;
  transform: translateY(-50%);
  background-color: transparent;
  width: calc(100% + 50px);
  z-index: 2;
&:focus,
  &:active {
    border: none;
    outline: none;
  }
}

input[type="range"]::-webkit-slider-thumb {
  -webkit-appearance: none;
  border: none;
  height: 50px;
  width: 50px;
  border-radius: 50%;
  background: transparent;
  border: 4px solid white;
  box-shadow: 0 0 8px 1px rgba(0, 0, 0, 0.3);
}

input[type="range"]::-moz-range-track {
  -moz-appearance: none;
  height: 15px;
  width: 100%;
  background-color: transparent;
  position: relative;
  outline: none;
}
Its time to add last part of our code. For widget to run we need to insert JavaScript code, so when the user drag our slider it changes image. The file should be created in the main plugin folder.
					document.addEventListener('DOMContentLoaded', function() {
    var divisor = document.getElementById("divisor"),
        handle = document.getElementById("handle"),
        slider = document.getElementById("slider");

    function moveDivisor() {
        handle.style.left = slider.value + "%";
        divisor.style.width = slider.value + "%";
    }

    slider.addEventListener('input', moveDivisor);
    moveDivisor();
});
Download our Image Comparison plugin for Elementor now and elevate your website’s visual appeal! With this powerful tool, you can effortlessly create stunning before-and-after image comparisons to captivate your audience. Enhance user engagement and showcase your work like never before. Get started today and unleash the full potential of your Elementor-powered website!
Read More
Welcome to WordPress. This is your first post. Edit or delete it, then start writing!